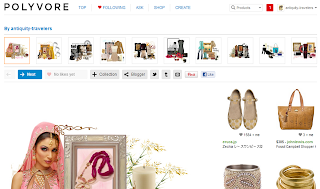
I get asked “how do you link your item through to multiple social media sites?” It is actually pretty easy and it is a great way to increase how many people you reach when promoting your work. The Pinterest team over at a site called Artisan Whimsy a creative bead chat thought we’d give you a quick and easy walk through on how to make sure all your posts on a single item can link through to all your social media. If you make jewelry, and you haven't yet checked out this site, go and take a look around this quickly growing community site.
Step 1: create a listing on your commerce site (Etsy, Artfire, your own domain, etc). Start with listing your item as you always do, but make sure to include a descriptive title (are they earrings or a necklace? what style: boho, steampunk, vintage? type of materials used?)
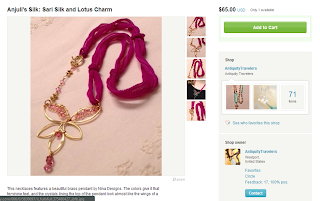
Step 2: ‘pin’ your listing to a designated Pinterest board full of items from your store. On Etsy you have a couple of options once you publish on the right side (tweet, pin, like on facebook). Be sure to include details on your pin just as you would have on your commerce site so people can easily find your other work and where to buy it.
 Step 3: go to your Pinterest and find the pin you just added. ‘Clip’ your Pinterest pin to your Polyvore items.
Step 4: go to your Polyvore profile and click on your new item and click the button on the right that says ‘create a set with this item.’ So now you create a ‘set’ using your item. Pull in colors or a style that really showcases your item to give people excited about how to match your item within their wardrobe. Publish your Polyvore set to your profile on the site (I usually uncheck the box that asks if you want to ‘share.’ I don’t like to have it show up on my blogger postings to all other bloggers.)

Step 2: ‘pin’ your listing to a designated Pinterest board full of items from your store. On Etsy you have a couple of options once you publish on the right side (tweet, pin, like on facebook). Be sure to include details on your pin just as you would have on your commerce site so people can easily find your other work and where to buy it.
 Step 3: go to your Pinterest and find the pin you just added. ‘Clip’ your Pinterest pin to your Polyvore items.
Step 4: go to your Polyvore profile and click on your new item and click the button on the right that says ‘create a set with this item.’ So now you create a ‘set’ using your item. Pull in colors or a style that really showcases your item to give people excited about how to match your item within their wardrobe. Publish your Polyvore set to your profile on the site (I usually uncheck the box that asks if you want to ‘share.’ I don’t like to have it show up on my blogger postings to all other bloggers.)

Step 5: Once your Polyvore is set is published, click on the button above your set that says ‘blogger.’ It will ask you if you want to publish on your blog, or send as a draft. I usually send as a draft so that I can edit it and add a little write up about the set I’ve created. Publish your Polyvore set as you would any other post.
Step 6: now that your Polyvore board is published on blogger, when someone clicks on it the link will take them to your set on Polyvore. Once at Polyvore they can click on your item and it will click through to your Pinterest board. At Pinterest when they click on your item it will take them to your commerce site. Everything will automatically link from the origin of where you ‘clipped’ and ‘pinned’ your item. Try it. Click on the Polyvore set at the beginning of this blog and you'll see that it links through all my various sites. it's pretty cool - huh?!


I love the way you showcase your beautiful necklace among the other items on Polyvore!
ReplyDeleteFor some reason I always thought it wasn't allowed to pin one's own items. Now I know better!
Your Carnelian board is so pretty, I was wondering how Polyvore was used, thanks for sharing this ♥ I need to make some time to play with Polyvore.
ReplyDeletei am going to file this away for when i feel up to the techno-challenge :-) you do make it sound pretty easy, though!
ReplyDeleteI'm going to give this a try next week. Thank you for giving us the steps. I may need to ask for help though. : )
ReplyDeleteOooo...good work! You make it all sound so easy :)
ReplyDeleteI agree with Edi, you make it seem so easy! Thanks for explaining it to us! I like how it looks!
ReplyDeleteGreat tutorial! I have never been on Polyvore before. It reminds me of Kaboodle!
ReplyDeleteGreat tutorial - you make it sound easy! Now, to just try this and see if my techno-challenged self can get it to work. I love Polyvore, but couldn't figure out how to combine the two, until your post!
ReplyDelete