Showing posts with label Shop Talk. Show all posts

Sunday, December 30, 2012

Etsy :: A Work in Progress

The one thing that I struggle with when it comes to my jewelry is selling it. I love to make it, to talk about it, to blog about it and I even enjoy photographing it. But when it comes to selling it; I simply struggle. I don't enjoy 'working the sale' and would far prefer to just give my jewelry away as so many of you know!
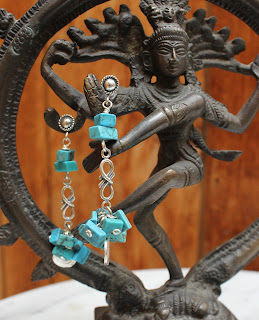
But alas, there is this nagging voice in my head. Ok, truth be told it is actually my husband (ha! there I said it) asking that I at least attempt to break even on my beady obsession. And so I have taken some steps to improve my Etsy store

I joined a wonderful group of Etsy shops this Fall called the BBA (Blogging Business Artisans) who have been a source of encouragement on Etsy. They have put out a challenge to all of us in the group to think about how we might improve our shops. I took this as a sign. 

In the past week I've taken several steps to update my shop. And I have to admit; it feels good to stop avoiding this, and I can see that this might actually help sales. So here is my running list (I'm sure I'll come up with more, but let's start here).

  1. Photography: I've been in search of a style that I like, that I think will shout "oh yes, I know that look ... it's so-and-so's shop."  Anyone whose been to my Etsy knows that it looks like perhaps 12 different people work here. Sadly, that is both my art and my curse. I like lots of things. But I've committed to getting my photography to one style. It will take a bit of time to swap out the photos, and I need a new camera. But I've begun. You'll see a new look in the shop (the photos in this post are examples - and taken by a friend - Thea of Baby Cocktails). 
  2. Regular Re-Stocking: I was really on top of this when I first opened my Etsy Shop in 2010, but in the past year I've let re-stocking fall off. Sometimes I went several months without adding a single item. It doesn't take a brain surgeon to diagnosis the problem there. I added about 30 new items in the past month. I don't expect to keep up that pace, but I needed to make up for some lost momentum this year. 
  3. Sections: Sections are a way to navigate your shop. I'm now at almost 100 items in the store. That's a lot, and people get lost. So I re-worked my sections in a way that makes more sense. Well at least to me, and I hope to my shoppers.
  4. Treasuries: One great tip I picked up from my BBA team is optimizing the use of treasuries (my treasuries). When I stock a new item, or add a new section (as I just did with Kitsch Stitch), a treasury is a great way to get the word out. But remember to include other shops, and then be sure to send them a note letting them know they've been included (don't forget the treasury link so they can find it!). This way you spread the word, and get views. 
  5. Social Media Linking: I've been trying to make sure I stay on top of this, but this feels a lot more like 'working the sale.' One way I've been able to deal with this (at least for me) is to have social sites that are separate between my personal (my real name) and my shop (Antiquity Travelers). I don't want all my personal friends on Facebook to think I'm constantly asking them to buy my stuff! But I have linked my shop FB page to twitter, so when I post on FB it automatically 'tweets' an update. I have entire boards dedicated to my jewelry on Pinterest, I have collages to highlight my jewelry on Polyvore ... but all absolutely need to link to the Etsy shop. That way if someone really likes a piece, they know exactly how they can buy it. This is still a work in progress for me, but I'm getting more disciplined about it.
I have a few more ideas in the works like a revamp to my logo. I want to keep the Shiva as it is part of my identity. It is a real item in my studio, and one I brought back from the Himalayas. So that stays. But everything else is up for grabs. How about all of you? Will you be making New Year's Resolutions to update your shops? Any ideas to share on what makes a better shop experience? Leave me a comment .... I'm interested!

Tuesday, August 28, 2012

BTW: Nina Designs

I don't think I could be more excited to tell you that I received a goody bag in the mail from Nina Designs. Several weeks ago I sent a note inquiring about becoming a blog partner.  I heard in the beginning of August that they were sending me items to create with, and when they arrived I literally gasped. They were more beautiful then I imagined! The findings are gorgeous, silk and sari fabric, and the blue leather is so amazingly soft. I just couldn't wait to get started.

I've been itching to get back to my studio and start working with these pieces. I have been traveling for weeks, and this past weekend was the first time I've been home in my own studio in over a month. 

I'm going to do a series over the next couple of weeks to talk a bit about each design -- starting Thursday. So, swing back by my blog to see my first earring design.

The materials above were provided as part of the Nina Designs blogging program. The author of this blog has not received any payment from above-mentioned company. The post above represents only personal opinion of the blog author. 

Friday, August 17, 2012

Freedom Fridays: Tutorial Double Wire Wrap Examples

Yesterday I posted a tutorial for how to do a double wire wrap loop. I hope that it was helpful to those who find a double wrap challenging. It really isn't that much different from a single wrap as long as you kept track of your wire. I had an excellent instructor that showed me the simplicity of wire wrap, and being methodical about how you hold your wire. The few tips can really help and can make all the difference in the world if you are trying to achieve a tight wrapping technique.


As a little bit of inspiration, I thought I'd post a few variations of this style. Same double wrap technique, same stone (African Opal - isn't it a gorgeous stone?), just slightly different styles. The first pair of earrings uses a 'long wrap,' or one that comes down all the way over the wire threading through the top drill hole in the stone. Personally, this is my favorite and most used technique. I also added a top bead -- a Swarovski pearl (a tough bead that can stand up to my wrapping!). I included a wrap around the bead to bring the wire back up to the top where I started to create a final loop. 

The second pair is an even shorter wrap than the one I demonstrated in the tutorial. This one shows off the wire triangle that frames the top of the bead. The style accentuates the long drop wire wrapping from bead to earwire. I also included a marcasite bead connector to give the pattern a little extra character. I love marcasite and use it pretty much every chance I get.

Thursday, August 16, 2012

Thursday Favorites: Wire Wrapping Tutorial

I had a request for a tutorial on wire wrapping. I've never done a tutorial before, so I hope this is clear! This is a quick demonstration for how to do a double wire wrap.  I used a large stone (African Opal) and 22 gauge wire so hopefully the steps are easy to see. And just for ease, I also used a larger type size.


Step 1: Thread the wire through the top drill hole and leave an equal amount of wire on either side - about an inch to an inch & a half on either side. 


Pinch the wire together at the top of the stone to create a little triangle with the wire. I like to hold the pliers flat so I can make sure I make the loop tightly across the top (shown in Step 2).

Step 2: To create the loop, wrap both wires side-by-side around the round-nose pliers. 

Step 3: I use my flat pliers to pull the wire around. Start with one of the wires so that they are opposite each other. Watch the wire wrap to make sure that they wrap tightly -- one on top of each other. This will create a smooth wrap vs. clumping on top of one another.

Step 4: Pull the opposite wire around and tuck it right up next to the other. Again watching to make sure that it stacks right beneath the other wire and creates a smooth wrap. Continue this process for 3-4 more wraps (to the desired size and shape you want with your wrap).

Note: Some people prefer to continue wrapping all the way down the stone to cover up the threading, so if that is the case then add a little extra length to the wire. 

Step 5: Once you've finished wrapping, again keep the wires opposite each other and cut the ends. This way you can tuck each end up against the bottom of the wrap for a more level base.

Step 6: Tuck the last of the wire up to the base of the wrap and smooth/ adjust the wrap for any places where it might look a little out of line.

Tuesday, August 7, 2012

BTW: Bohemian Inspired

Lately everyone is buzzing about Lorelei and Erin's new book Bohemian Inspired Jewelry. I have to admit that I have read it through at least 6 or 7 times now and have started to use it to inspire some of my upcoming pieces. Like this blue cord necklace on my bead table this week.  

A week or so ago I was over at Kashmira's blog and loving a new pendant she had just created with beautiful knotting. She pointed me to Lorelei and Erin's book, and I realized that there are so many techniques they use that I am loving. And that photography is so wonderful --- eye candy to a beader. My husband laughs at me with my nose stuck in one of these books and completely ignoring him. I can get lost for hours in a good beading book.

I've been trying my hand at a few of their techniques, and once I get going they truly inspire all kinds of ideas for me. I have had these glass discs in a bead drawer for years now. And realized that the knotting that Kashimra was doing would work so well with these. I also had some beautiful silver balls, yes also in a drawer for much longer than I'd like to admit. A little polishing from a sliver cloth and look at them shine! There will be more to come with these knotting techniques. I'm just getting warmed up.

Next, I grabbed some spare leather that I had sitting around from a chair I recovered some 15 years ago. I figured eventually I'd find some use for it. Some of the leather that they use in the book is so unique and gorgeous I just have to try it. So I've got my shears and leather all spread out for the next project. Look for more pearls and leather coming soon from me ... they will match my Glam meets Boho pearl and leather bracelet.

So at the moment my bead table is covered in Bohemian inspired work. That will keep me beading for weeks ... I just have to find time to stop and blog a bit to show you all.

Friday, July 27, 2012

Freedom Fridays: Peyote with Spirit Bead

Recently I received a large hat-full of beach glass from my sister-in-law who had been visiting the Maine Coast. She pulled out a small aqua piece of glass and asked if I could make something with it? Hmm, it is pretty small. So this might take some creativity to figure out how to include this.


At the time I had been working on a beaded bracelet and she commented on how much she liked the blue colors of the beads. So I thought I'd try to combine the two. Originally I tried a beaded bezel around the piece of glass, but it is simply too small and left very little of the glass to see once complete. Ok, so scratch that. I also considered gluing a silver piece with a loop on the glass that I had used recently on beach glass pendants. The only problem was that the leaf design on the piece would have covered the entire surface of the glass. So I created my own hammered silver to wrap around the glass and glue into place. I decided to use it as a charm hanging off a custom hammered silver toggle. I wanted to create a special piece for her to remember her trip back East this summer that she could wear and remind her of her time both at the Maine shore and her time with us up in the Adirondacks.


The other design element I used was the Native American tradition of peyote and a spirit bead. I've been enjoying reading a book I recently picked up by David Dean called Beading in the Native American Tradition. It is a fabulous book that takes you through all of the various bead stitches used by the American Indian tribes like: gourd stitch (peyote), the Comanche stitch (brick), lane stitch (from the Cheyenne, Crow and Sioux) and loop stitch (Cheyenne), running stitch (Crow). Just to name a few.


Specifically he talks about Peyote and the origin of the stitch. The stitch is also called the Church design. Native American's used beaded feathers (gourd stitch that wrapped around the handles) as part of the peyote ceremony that involved prayer and the peyote cactus as sacrament. The bead stitch associated with their 'church' rituals was said to be done in the 'peyote' style. 


The other tradition used by Native American beaders was to include a 'spirit bead.'  This tradition dates as far back as 800 A.D. and served as talismans against threat.  The spirit bead is one that stands apart from the rest of the pattern; sometimes a bead of a different color. Native Americans believed that each piece should contain an intentional mistake (or spirit bead) somewhere within the pattern because humans cannot achieve perfection. If we attempt perfection it could be bad luck. And the spirit world would not enter into anything that was flawless. So a spirit bead was sewn in among the others to provide a flaw where the spirit could enter and flow through the beadwork. A spirit bead is a reminder anything created by human hands cannot be perfect. These Native American beaders would intentionally include a wrong colored bead as a way to honor the Great Spirit and express humility. 

Tuesday, July 17, 2012

BTW: Playing with String

I have seen lots of tutorials lately for fun wrap, or slide bracelets. And as I looked through the patterns, it seemed like it should be pretty easy to make any one of of these styles. At least that is what I thought before I got started. As easy as it looks, I think it is going to take more practice before I really get the hang of it! 


I decided to give a couple of the patterns a try. I started with medium sized wooden beads. I like this pattern with the darker twine becoming part of the pattern itself. My tension needed practice, and so I decided that maybe I should try a slightly larger bead. I moved on to porcelain flat rounds. While I like the look of this, when it is lying flat, it is tricky to keep the beads flat when beading. This also can make the pattern uneven.


I did try various types of twine or thread ranging from stiff twine, to pliable cord to waxed beading thread. I think I prefer the later to work with, which is what I used on the final slide knot style. While I had more luck with this pattern, I will say I ripped out the slide knot at least 3-4 times before I felt like I understood how to make this closure. I used to do a lot of macrame when I was a kid, and this pattern reminds me of some of the classic knots and wraps. So that's what's on my beading table at the moment. Just some practice pieces. I'd love any tips or tricks from the 'stacked and wrapped' crowd out there!

Saturday, July 14, 2012

Shop Talk: Working with Beach Glass

My brother and his family recently spent a few days on the coast of Maine relaxing, swimming in the ocean and beach combing. When they arrived at our place I was handed a hat-full of beach glass they found along the Atlantic Ocean. Literally in a hat. 

Some of the more interesting pieces are full bottoms to bottles, which help identify where the glass came from. However it is far to heavy for me to use for jewelry even as a pendant for a necklace. So I was focused to the smaller shards in the bottom of the hat. 

I had a chat with several shops to try to figure out how to use the beach glass. I explored the option of drilling the glass, but decided that it sounded like quite an operation to set up a drill station. I was told I'd need to do the drilling with flowing water. There just isn't any place in my house where I could set that up; not without taking over a bathroom.

A bead store suggested I try a specialized glue (E-6000; industrial strength craft adhesive). I also picked up a silver leaf pendant loop, which are designed specifically for gluing as they have a grid pattern on the back to hold the glue in place. After one day the glue is set. 

Lastly, I polished the glass. Some people prefer the rough look of the tumbled beach glass, but I had a tip that if I used just a dab of mineral oil it would give the glass a bit of luster. You can see above 2 pieces of the same glass: one with mineral oil (the finished pendant) and one without. Also in the 3 necklaces; the center aqua blue glass is not polished. I think I'm going to do this one as well ... once the glue sets. I took the picture while it was still drying, but you can see it is very sturdy glue. So how do you prefer to work with beach glass? Wire wrapping or gluing? Polished or rough and tumbled?

Thursday, July 12, 2012

Thursday Favorites Blog Hop: African Opal

I know I've written about African Opal before, but I can't help mention it again as one of my favorites. The color patterns and ability to match this stone seem endless. The bracelet highlighted is paired with black freshwater pearls and hematite. But I have also paired this stone with sandstone and coral. Each pattern has a completely different feel ... the sandstone version was warm, and this one has almost a cool marble look to it.

I made this bracelet a while back for a friend and I had barely finished tying up the last knot when she had claimed it and stuck it in her bag. Close friends do that sometimes. I always try to get a nice picture of each project, but in this case ... well. However, she asked me the other day if I would swap out the clasp. She isn't liking the magnetic closure for some reason. So I'll play around with another closure. But in the meantime this piece is back on my bead table, and getting it's chance to be photographed.


THE MEANING OF THE STONE:
Energy: ease the process of change (or perhaps 'the' change)  
Mystical Property: opal is a stone of inspiration that enhances imagination and creativity (note to self: must get more of this stone)
Divinatory Meaning: said to help one be 'invisible' in situations where you'd prefer not to be noticed (feeling a tad Harry Potter with his invisibility cloak)
Zodiac: (water signs) Opal is a silicate, containing water, which correlates to emotions: it clarifies by mirroring feelings, frees visualization, clears imagination and provides vivid dreams. I'm a Pisces, which I guess explains my love of this stone.

Thursday, June 21, 2012

Thursday Favorites Blog Hop: The Next Generation

Are you mentoring anyone? I was asked that the other day by a friend who was lamenting that we don't seem to teach our children how to make things from scratch or teach them how to sew, or craft, or knit like our moms and grandmothers did. 

I noticed my daughter kept hanging around the bead table asking if she could help? Usually the answer was "sure can you grab that thread for me?" or "would you mind sorting these beads for me?" But this question from my friend was bothering me. And I decided it was time to do something about it. I started a simple beaded peyote bracelet and showed my daughter what I was doing and spilled the beads in front of her .. then let her at it.


Look at the concentration on her face. It might take a few times to get that stitch straight, but look at her go. The next beading generation? 

Then the funny thing was that within a day's time I saw the exact same post on my friend Thea's blog. Thea over at BabyCocktails is a popular knitter, and someone I've known for a long time. Her post was exactly what was going on in my house. She has the next generation knitter going to town over there! It is a cute story; if you have time, stop by and read the mystery note left for Mom on her table.

So for this week's Thursday Favorites feature, I'm featuring two of my favorite next generation artists. Keep on beading and knitting girls! 

Tuesday, June 19, 2012

BTW: My Own Room

Usually I show what project I'm working on (up close) on Bead Table Wednesdays. But the project on the table (in this shot) is the one I revealed on Sunday; the turquoise ribbon choker. So since you've already seen that, I thought I'd 'pan out' and show you my table and my newly re-claimed room. Well it isn't an entire room, but a nice big corner of it. 


This room has been dedicated to the kids for years, but now that they are outgrowing all the dolls, blocks, dress up clothes, etc ... I was able to clean it out. I managed to organize a great, dedicated space to focus on my beading projects. Complete with a few closets to store all the tins, tools and photography equipment. 


I've only had this space for about 2 weeks now, but I totally love it. I can lay out my projects and beads and still have space to work. And I'm no longer forever digging through piles of unorganized beading stuff. And I have room for friends ... maybe I'll have to start a beading group?

Sunday, June 3, 2012

Shop Talk: What Exactly is Boho?

I took the advice of several of you and added both a charm and a little bit of silver chain. This is the final version of the Boho Southwestern bracelet. I also made a second version with contrasting black jasper in a twist pattern and a longer slide clasp. I couldn't decide if this second bracelet was really Boho, and so I decided to check out the definition of Boho.


Got to love Wikipedia. I always get a lengthy explanation to my questions. The search for Boho led me to a definition of Bohemian and "people who live unconventional, usually artistic lives." Hmm, well that could mean a lot of things. Wikipedia calls the fashion trend inspired by Bohemian lifestyles as 'Boho Chic' where "ruffly floral skirts are worn in hopes of looking bohemian or nomadic." The definition also says that it is inspired from gypsy girls who are "sexy precisely because they do not give a hoot for fashion." I love this last part. 


I thought I'd cross reference this definition with one from the Urban Dictionary. Here they call it vintage. I find the use of vintage all over the map, which I wrote about a few blogs back. This definition says Boho Chic combines "colorful, detailed, folk-inspired pieces with simple, modern pieces." They give an example of "wearing a beaded peasant dress with a white tanktop." A popular look in my part of the world. They claim it was started by "Sienna Miller in 2005 who wore bohemian-style clothing to a movie premiere in London." My favorite part of this definition is that they claim the style will be dead by 2007. Really? It's dead?


What do you think .... is Boho dead?

Friday, June 1, 2012

Shop Talk: Turquoise Quest


The turquoise beads that I've been pushing around my table are starting to take shape. This first installment is a twist bracelet with a slide clasp. The stones range from blues to greens in hue, and I mixed in a little dyed coral in a sky blue to balance it on the bluer side. I am not entirely happy with this one. It needs something ... perhaps a charm? 


I am actually in search of more contrast with the beads. So back to the bead store (I know --- can you believe it --- an excuse to shop) to pick up even more turquoise rounds and a contrasting black jasper. 


Fairly certain I will have several extra pieces of turquoise jewelry ending up on my Etsy site given the amount of turquoise I now have sitting in front of me. I'm hoping I have a few turquoise lovers out there.


I'll be back with the next installment and a revised bracelet pattern, along with a necklace and of course earrings. I'm probably going to have to create several pairs of earrings as I can't decide if I should go Southwestern, Boho, or use a touch of elegance with some pearls. Most likely I'll do all three and ask your advice! So check back ... and I'll have more for you to ponder with me in my turquoise quest.

Saturday, March 24, 2012

Shop Talk: Working with Polymer

For someone who says that they can't draw ... check out these designs! A friend and I started a dialogue many months back (someone I met on one of my many beading sites I regularly visit). I simply fell in love with the designs she creates.  


They are whimsical but thoughtful, play with fantasy but have such a natural look to them ... I just love them. She uses polymer clay and mixed media to create these pendants. The results are so unique and simply beautiful.
 

I bought one of her pieces from her Singing Cat Studio off of Etsy a few weeks ago (right). I wanted to try my hand at creating around one of her pendants.


I decided to use some stones a friend of mine handed me saying she didn't know what to do with them. They were natural aquamarine stones that ran in color from white, to pale blue to pale amber. I've never seen aquamarine in these colors, but I like that it is not the expected colors. I thought using these stones along with apatite rounds would create an interesting blend for the pendant.


In the spirit of mixed media, I added suede and a Mokuba ribbon. If you've ever been in the Mokuba show room in NY ... then you know it is like a candy store! It has rows, and rows, and rows of the most amazing, beautiful Japanese ribbon. I seriously had to restrain myself, and still I walked out with over $200 in ribbon!

The mixed media effect seemed to really pull out the complexity of the colors she used in the pendant.  If you'd like to see more of her work, or find out more about her check out the following links. I found a lovely interview of her from 2010 which talks about her hope of growing her Etsy shop, which I would say has become quite popular and successful. She also has a showcase of her work on flickr if you want to see more of her designs. 

Saturday, February 11, 2012

Shop Talk: Artistic License

I mentioned in my last blog that I am working on a project with a friend from Israel. She sent me a stash of beautiful handmade buttons, and I'm getting to work on creating bracelets for each one. The next bracelet was designed to bring out the cross-hatch pattern in the button (left). The button is such a rich color with the black and gold tones. I decided to use one of my favorite patterns. It normally calls for only one "S" stitch across the top, but I added a second to bring out the cross hatch.


I'm always playing around with recipes in the kitchen, and I have a tendency to do exactly the same thing with a beading pattern. Once I've mastered it ... I take a little artistic license to the colors, the sizing ... and well pretty much anything I can tweak as long as I don't lose the general integrity of the piece.


The first version I made of this bracelet (right) I tried to stay close to the pattern. The central bead in the pattern was a green turquoise with gold bead accents. So I guess on second thought, even with this one I took some artistic license because I thought the green on green color gave it depth and the pearls added just a bit of elegance.  I laughed when one little girl commented on my post to Beading Daily, she said she thought it looked just like a caterpillar.  I do have to agree with her.


The two bracelets certainly have their own style. The cross hatch (above) and rich colors has almost an Elizabethan look to it. I do love how the cross hatch stitching completely changes the focus of pattern. I think this version is growing on me. 

One thing that consistently brings a bracelet together for me is the button.  I actually tend to design around the button -- to bring out the colors, shape or style.  I have a huge jar of buttons that people have discarded, and I've collected through the years.  I have one or two of each button, and while that isn't enough for sewing it is a wonderful variety for beading!  

My friend's buttons have found a very good home. I am a self professed button collector.


To give you a sense of the versatility this pattern has, I've posted a few of the versions. I have used different colors, bead sizes and top stitching.  It amazes me how different each one looks.
Materials
1. black banded agate rounds, onyx rounds, Miyuki seed beads, Beauty Button 
2. amethyst rounds, crystal gem cuts, mat Miyuki seed beads, antique silver button
3. adventurine rounds, grey freshwater pearls, mat Miyuki seed beads, antique button
4. rose quartz rounds, red freshwater pearls, mat Miyuki seed beads, rose button
5. black banded agate rounds, freshwater pearls, mat Miyuki seed beads, antique button
6. adventurine rounds (2 sizes), mat Miyuki seed beads, freshwater pearls, pearl button


I discovered this pattern a few years back in Beadwork Magazine. The pattern is called Crystal Helix by Barbara Falkowitz. This particular edition is probably one of my most used pattern books.  The pages are dog eared and I've got sticky notes all through it. 

Tuesday, January 31, 2012

Shop Talk: North Country

Each summer in the heat of July we pack the car and head up to the northern border of the Adirondacks. Up in the mountains it is comfortably cooler.  It's one of those places where you exhale deeply, close your eyes and just clear your mind.  I love this place. 

Last summer I discovered that the local bead store that I had been going to for years also had a bead class! 

I decided to give it a try.  What I found was a group of local beaders who do much more talking than beading. They called it their "bitch & stitch" group. The conversation was full of fantastic local gossip.  I found out whose husband was driving them nuts, whose neighbor was 'just over the line' and who said what to whom.  I didn't know any of the names, but felt right at home. 


We did have a project to work on as we gossiped.  Yes my friends, this is a sought-after pattern by armies of beaders called: Dress Up a Chevron Chain with Flowers from the April 2007 Bead and Button Issue.  

The more you bead, and get better with your beadwork, the more you want to try your hand at complicated patterns.  The problem is ... they are normally unwearable by the average Joe who wears a suit into the office each day.  Basically when you're done with the project it can look like you've recreated the equivalent of a quilt and strapped it to your wrist.  

What makes it worse is that your fellow beaders tend to applaud you for the more intricate, complicated pieces.  The Chevron pattern (above blue bracelet) is one of my pieces that has some of the highest 'views' from fellow beaders with the highest of ratings ... 5 out of 5 stars on Beading Daily.com

Meanwhile the ones I find more wearable, that I can pull off with a work blouse, get low scores. Such as the right angle weave to the left here.  Top scores on this one only got 3 out of 5 on Beading Daily.com

Even this slightly more complicated pattern with jasper and a slide clasp only managed to get a 4 out of 5 on Beading Daily.com

I have started taking apart the complicated patterns and recycling the beads. I just have too many pieces laying around getting no use.

So my question is ... Who do you design for?  Accolades from fellow beaders, or the simple patterns that sell better on Etsy?

Friday, January 13, 2012

ShopTalk: Chakra Relief With Agates

My Jackie O friend from the office asked if I'd design some jewelry to match the color of her eyes. The first item I made for her was a blue lace agate necklace. I did however, have a pair of earrings already done that I thought would also work for her.  An unusual lace agate stone with a beautiful rib cut (right).  She took these straight away while she waited for me to finish the necklace.  

Agate is a beautiful stone. It is creatively colored and striped by nature, and adds so much texture to jewelry.  This one is a cool grey wave, but I've worked with fiery orange and reds as well that have a warm glow to the stone.   

THE MEANING OF THE STONE:
Energy: protective  
Magical Property: relieves insomnia and brings good dreams (place under pillow at night)
Chakras: agates can remove blockages from any chakra (who knew?)

Most of the agate I work with tends to be in the orange-brown color hues. The necklace shown (right) includes an orange-white tiger agate with a series of other natural stones to bring out the colors including; peach colored pearls, sandstone and coral seed beads.  I've used this tiger agate in a lot of projects including simple drop earrings which are easy wear for everyday.  


My niece asked me to repair some orange agate jewelry for her, which of course arrived in a ziplock bag (my repair projects always start this way!). She was wearing the pretty necklace at school, and a boy grabbed it and pulled.  Ah love at the age of 10.  Perhaps he had a chakra blockage that needed immediate attention.  


So I didn't have enough stones left for a necklace, and decided to create cluster earrings for her (lower left). She was quite happy with the change from necklace to earrings. And, according to her ... the bigger the earrings, the better. Not sure her mom agrees... I guess just as long as they aren't worn on the playground. 


I never get tired of agate. One of my favorites is a simple natural stone like the ones (right). I created wire wrap earrings on hoops, which I kept for myself.  The light catches these and brings out the warmth of the stone, which I absolutely love.  And a pretty way to find chakra relief.

Wednesday, December 28, 2011

Shop Talk: Finding Your Inner Jasper

We had friends visiting for the holidays which always turns into a multi-day, family play date.  No where else have I lived where the notion of a play date is so prevalent.   But here on the East Coast I have quickly come to understand that it is a very scheduled atmosphere, and one where parents feel the need to schedule every waking hour for their child.  Not to mention ensure that their kids are escorted from one location to the next. 


Long gone are the days where we as kids would run between houses, walk ourselves to school or run up to the corner store to pick up milk or loaf of bread for mom.  It just isn't done anymore --- at least not where we are.


While I am still getting used to the notion of a play date, it is so much fun when you can do that not only for your kids, but with the parents of the kids.  That is how it goes when we see our friends from Boston.


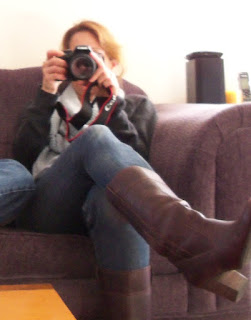
Our husbands are happiest playing games, literally and figuratively. The youngest girls have their own variation of games usually involving the 3-Ps: petshop, puffles or penguins.  The older, barely just-turned teenage girls are simply too cool for either. The amazing part of this is everyone has their own partner in crime ... and so my friend and I settle in for a 24-hour extravaganza of 'talk shop swap.' I managed to get a picture of her (behind the camera) and she has the respective one of me (behind the camera). She (Baby Cocktails) designs patterns for knitting, and I design jewelry.  And so there is no end to what we can talk about with our blogs, our respective craft communities (Etsy vs Ravelry) or the use of twitter and facebook ... personal or public.  Riveting I know, so I'll spare you the details and get right to jewelry.   


Baby Cocktails appears to have a love of jasper.  Perhaps un-confessed at this point, but it will dawn on her once she's unpacked the stash I've sent her home with.  The blue imperial jasper (above) was as if I made them with her in mind. I didn't originally, but they were an absolutely perfect fit. The hoops and the stones mirror each other and are going to look amazing with the new grey-blue sweater she's working on.  I'll be sure to post it once complete.  


I LOVE this style of jasper with its complex 'veining' patterns. Imperial jasper is dyed in several colors: blue, green, red, sometimes orange.  The brecciated result is caused by fracturing or breaking in the stone from stress and/or shrinkage.  Yes ladies sometimes shrinkage can be a beautiful thing.  The stone lovers in the bunch will tell you that jasper is used as a protective stone and will align your chakras to get just the right balance of yin and yang energies.  It protects against evil spirits and any venomous snake and spider bites.  So Baby Cocktails should be all set as she renovates the house!  For that story you'll have to check out her blog.  


And just when you thought I was done talking about jasper, enter the ocean variety.  Baby Cocktails may just be finding her inner jasper, but I've long known mine runs deep.  


As we were checking out a friend's blog on how to ensure your knitting is Fit-To-Flatter we decided (to be fair it was mostly me not we) that a nice pop of color with some well selected jewelry would add to the look of people's knitting --- without distracting from it of course. Wink, wink, shameless plug for my jewelry to adorn my friends in the knitting world. I often say when people ask me why I'm so prolific with jewelry it is "because I don't knit."  No one ever asks a knitter why they knit. Or why they are forever pulling out a project from their bag to knit and talk. So for Fit-To-Flatter the selection included yet another jasper: ocean


This variation is found on the intertidal shores of northeast Madagascar, and apparently can only be mined at low tide.  The colors vary widely, but what make this one unique are the multi-color patterns typically in circles or even polka dots.  I prefer more of a wavy pattern as seen (above).  I'll be looking for how Fit-To-Flatter ends up using this pair, and will be sure to post.  Wink, wink more shameless plugs.

AntiquityTravelers on Etsy